Ahhh coffee, it is a morning miracle, a daily ritual, almost a rite of passage for some of us. Whether it’s a cappuccino, espresso, or Nescafe, there is something for everyone. If you have a more sophisticated palette and are craving something a little smoother than instant coffee, then plunger coffee is a great cost-effective homebrew alternative.
The French press, cafetiere, or press pot are just a handful of the terms used around the world to describe plunger coffee. Plungers are recognized globally and have a long, rich history dating back to the mid-1800s. Even today, the plunger’s origins remain a bit of a mystery. It seems both the French and Italians have staked their claim on inventing this brilliant coffee-making contraption.
Let’s explore the coffee plunger in more detail to find out what all the fuss is about.
Coffee plunger parts explained
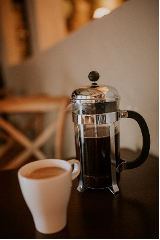
Before we get into the detail about how it works and tips to make the best brew, let’s explore the plunger itself. Plungers are pretty simple to use because they are comprised of just two parts – the beaker and the piston. Our best coffee plungers can be found here.
The beaker is usually made of glass or plastic and looks similar to that of a science beaker. The difference is that it comes equipped with a metal or plastic handle on the beaker’s side to make pouring the coffee easy.
The plunger pump or ‘piston’ is used to separate the coffee grounds from the boiling water. When the piston is pressed down, the mesh strains the water, leaving the ground coffee beans at the beaker’s bottom.
A step-by-step guide to brewing plunger coffee
Before you start making your brew, it is important to clean out your plunger beaker and piston to remove any old coffee residue. A clean plunger will create a smoother taste by removing any bitter taste from your previous brews.
Once you have cleaned your plunger, you can get started with brewing your next coffee! Follow this quick and easy step-by-step guide when using your plunger:
- Preheat your cup and plunger beaker with hot water
- Add a rounded tablespoon of pre ground coffee to the beaker (one per cup ratio).
- Then add the required number of cups of freshly boiled water to the beaker.
- While adding the water, gently stir the mix of grounds, then replace the lid.
- At this point, your coffee will have a slightly creamy look due to the carbon dioxide being released.
- Wait a couple of minutes and then slowly depress the piston. By doing this slowly, you will help prevent spillage and keep the coffee below the mesh.
Brewing tips from coffee connoisseurs
- Coarsely ground beans work best for plungers – they should have a similar texture to sand granules. If your beans are ground too fine, they will go through the mesh on the piston when you are depressing it. (And remember there are lots of uses for these coffee grounds when you have finished your mug of coffee.)
- Plunger coffee will grow bitter when left too long in the plunger. Therefore it is really important to serve plunger coffee immediately.
- Plungers are versatile. You can use your plunger for virtually anything that needs to be brewed in water and strained. So the next time you plan to have a cup of tea using loose tea leaves, why not use your plunger instead of using a strainer.
Did you know? Plungers have also been used to strain broth.
Selecting the right coffee beans

When it comes to plunger coffee, the perils of picking the wrong beans means that you’ll end up with a chewy cup of bitter-tasting sludge as opposed to the rich, smooth brew you are yearning to taste. Drinking sludge is enough to turn you off the plunger scene entirely.
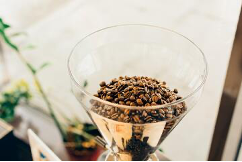
To obtain the richest and fullest flavour from your plunger coffee, try using high-quality medium roast Arabica beans. This is because Arabica beans exhibit high intensity and flavour. These beans are often available from African countries such as Kenya or Ethiopia; alternatively, they can also be found in regions of Central America.
Coffee beans from these regions have a long finish or after-taste and are best suited to the plunger coffee experience.
Tips for the keeping your beans fresh
- Buy your coffee the same way you do your vegetable – fresh and frequently.
- Always store opened coffee beans in an airtight container. If you are planning to keep it for longer than a week, make sure you store it in a cool place.
Reasons to buy a coffee plunger

There are a lot of positive reasons for drinking plunger coffee; these include:
- The plunger is low maintenance and easy to maintain
- It is a cost-effective option to other coffee making alternatives on the market
- It is quick and easy to use, making it ideal for those on the go with limited time
- It allows you to brew with really fresh beans which make a rich and delicious coffee
- You don’t need electricity to use it, making it great to take on camping trips and the outdoors.
- The plunger itself is versatile and suitable for loose leaf tea, ginger and lemon mixes, and cold brew coffee.
Plunger coffee is not for everyone – even though some would consider that a bad cup of coffee is better than no coffee at all. One of the main reasons people avoid plunger coffee is that it is notorious for not straining the beans well and subsequently leaving grainy sediment in your brew (aka muddy waters). However, you can overcome this by using a good quality plunger and by selecting the right beans. And remember, practice makes perfect!
When it comes to coffee there is never a one size that fits all flavour out there. The way you drink and make your coffee is all subjective to your personal taste. That said, plungers have been around for the past two hundred odd years and are known globally, so next time you have a chance, give plunger coffee a try to see whether it is to your liking.
